
How to Find the Area of a Trapezium: A Step-by-Step Guide
The trapezium is a four-sided shape that PSLE students encounter across geometry topics. While most students can identify the shape, many lose "easy marks" when finding the area, especially when the question involves a complex composite figure.
The area of a trapezium depends on two key measurements: the lengths of its parallel sides and the perpendicular distance between them. These values are typically combined using a standard formula to calculate the total area enclosed by the shape.
However, there is more than one way to find the area of a trapezium, and practising different approaches, such as understanding how the formula is derived or applying it to composite figures, helps build confidence during exams.
What is a Trapezium in Geometry?
A trapezium is a shape in geometry that belongs to the family of quadrilaterals. Despite coming in many different forms, all trapeziums share one defining characteristic: exactly one pair of opposite sides that run parallel to each other.
The main components of a trapezium are:
- Bases: The pair of opposite sides that are parallel to each other.
- Non-parallel sides: The other pair of two sides, which are not parallel. They can slant at different angles and vary in length.
Why is It Called a Trapezium?
The word 'trapezium' has its roots in ancient Greek. It comes from the Greek word trapeza, meaning 'table', which itself was formed from two parts: tra-, meaning 'four', and peza, meaning 'foot'. So the original meaning was something close to 'four-footed', describing the shape of a dining table.
The diminutive form trapezion, meaning 'little table', was later applied in geometry by the Greek mathematician Euclid to describe an irregular four-sided figure. The connection makes sense visually: a typical Greek table of that era had one side shorter than the opposite side, mirroring the shape of a trapezium with two parallel sides of unequal length.
The word passed from Greek into Late Latin as trapezium, and entered English in that form during the 1560s. It has carried the same geometric meaning ever since.
Key Properties of a Trapezium
The key properties of a trapezium further reveal its structure and build the conceptual foundation needed to work with this shape across different question types.
- A trapezium has four sides and four interior angles.
- The sum of all four interior angles is always 360°.
- The two angles formed between one of the non-parallel sides and the parallel sides add up to 180°. This applies to both legs, so there are two such pairs of supplementary angles in every trapezium.
- The mid-segment of a trapezium, the line segment connecting the midpoints of the two non-parallel sides, has a length equal to half the sum of the two parallel bases.
Where Can You See Trapeziums in Real Life?
The trapezium is one of those shapes that appears far more often in the world around us than most people notice. Once students learn to identify it, they start spotting it everywhere.
- Rooftops and Architecture: Many residential rooftops, particularly those with sloped or hipped designs, exhibit trapezoidal cross-sections when viewed from the side. In Singapore, this is visible across both landed properties and HDB blocks with angled roof structures. Architects use the trapezoidal shape because it allows rainwater to run off efficiently, which is particularly important in a country that receives heavy rainfall year-round.
- Bridges and Flyovers: The supporting beams and girders used in bridge construction are frequently trapezoidal in cross-section. The shape distributes the load carried by the beam more evenly than a rectangle would, making it structurally more efficient. Many of Singapore's expressway flyovers and MRT viaducts incorporate this design principle in their support structures.
- Drainage Channels: The open drains and canals commonly found throughout Singapore, including those managed by the Public Utilities Board (PUB), are typically trapezoidal in cross-section. A trapezoidal channel is wider at the top than at the base, which allows it to handle larger volumes of water during heavy rainfall without overflowing. Engineers calculate the cross-sectional area of these channels using exactly the same trapezium area formula taught in primary school Mathematics.
- Furniture and Interior Design: Trapezoidal tabletops, shelves, and countertops are commonly used in interior design when fitting furniture into angled or irregular spaces. Conference tables, reception desks, and modular shelving units frequently use trapezoidal panels to accommodate corners or create a specific visual effect.
- Ramps and Road Kerbing: The side profile of a road ramp or a pavement kerb is often trapezoidal. The sloped face provides a gradual height transition, while the parallel top and base surfaces ensure stability. Engineers calculate the volume of materials needed to construct these ramps using the trapezoidal cross-sectional area as a starting point.
- Art and Graphic Design: Trapezium shapes are widely used in logos, poster layouts, and decorative borders to create a sense of perspective and depth. The shape draws the viewer's eye naturally towards the longer parallel side, making it a useful compositional tool.
3 Types of Trapeziums You’ll See in Exams
Not all trapeziums look the same. Students may encounter different variations in examinations.
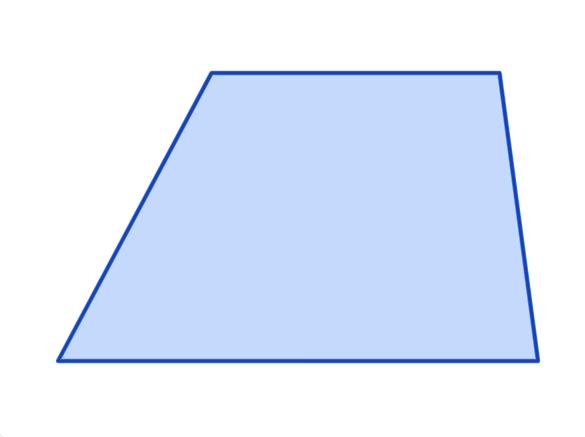
Standard Trapezium |
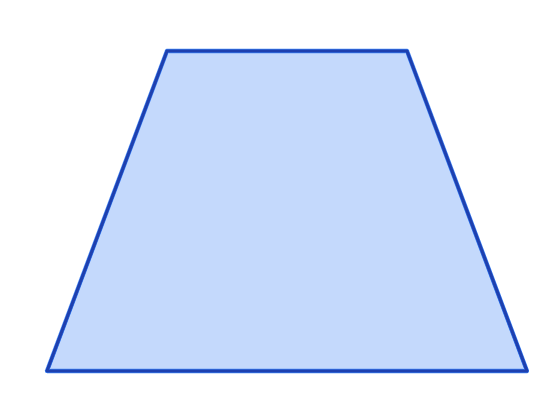
Isosceles Trapezium |
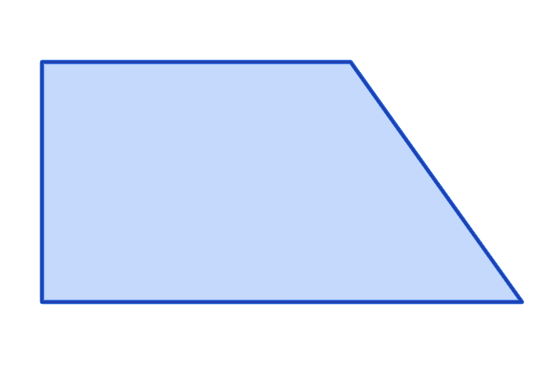
Right Trapezium |
|---|---|---|
|
The most common form: one pair of parallel sides with two non-parallel sides of different lengths. The shape is asymmetrical, and neither leg is perpendicular to the bases. |
Both non-parallel sides are equal in length, and the shape is symmetrical about a vertical line through its centre. The base angles on each pair of parallel sides are equal. When a trapezium question mentions equal non-parallel sides or shows a symmetrical shape, it is an isosceles trapezium. |
One of the non-parallel sides is perpendicular to both parallel sides, forming a right angle at one corner. In this case, the perpendicular leg is also the height of the trapezium, which simplifies the question by making h directly available from the diagram without further calculation. |
How Does a Trapezium Differ from Other Quadrilaterals?
Unlike other quadrilaterals, a trapezium has a unique feature that sets it apart, making its shape and properties easy to recognise and understand.
How to Find the Area of a Trapezium?
Calculating the area of a trapezium becomes simple once you know its key parts and how they work together.
Parts of a Trapezium
Before applying the trapezium area formula, students should be able to identify each part of the shape in a diagram.
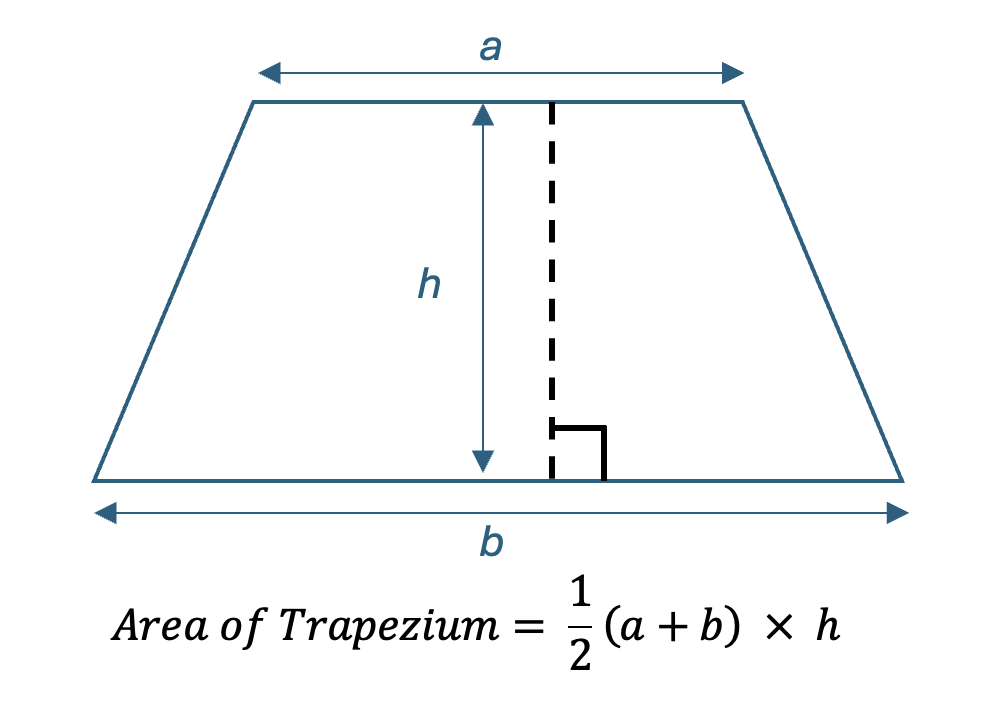
- Parallel sides: The two parallel sides are labelled a and b in the formula. The longer base is usually, though not always, labelled a.
- Non-parallel sides: The two non-parallel sides give the trapezium its distinctive slanted appearance. The legs are not needed to calculate the area of a trapezium and should not be confused with the height.
- Height (h): The perpendicular distance between the two parallel sides. This is not the length of either leg. It is the straight vertical distance measured at a right angle between the two bases.
What is the Formula For Finding the Area Of a Trapezium?
There are a few ways to calculate the area of a trapezium: the standard or the median formula.
1. Standard Formula
The area of a trapezium is calculated using the following formula:
Area = ½ × (a + b) × h
Here is how you can apply it step by step:
- Step 1: Identify the two parallel sides (a and b) from the diagram or the question. Write down their values and make sure both are in the same unit of measurement.
- Step 2: Add the two parallel sides together to find their sum: a + b.
- Step 3: Multiply the sum of the parallel sides by the height (h) of the trapezium.
- Step 4: Multiply the result by ½ to arrive at the final area. Express the answer in square units (cm², m², etc.).
The formula can also be written as:
Area = (a + b) ÷ 2 × h
Both versions give the same result.
The second version is sometimes easier for students to process because it makes the averaging step visible: add the two bases, divide by two to find their average, then multiply by the height. Thinking of it this way can also help with memory, because the formula follows a logical pattern: average length of the parallel sides, multiplied by how far apart they are.
2. The Median Formula
There is a third version of the trapezium area formula that uses the median.
The median of a trapezium is the line segment that connects the midpoints of the two non-parallel sides. Its length is always equal to half the sum of the two parallel bases.
This gives the following formula:
Area = median × height
Where the median = (a + b) ÷ 2
In most questions, students will calculate the median themselves from the given parallel sides before multiplying by the height. However, some questions provide the median length directly. In those cases, this version of the formula allows students to skip the addition step entirely and substitute the median value straight into the calculation.
How is the Formula for the Area of a Trapezium Derived?
Learning how the formula for a trapezium’s area is derived shows students why it works and makes solving problems more intuitive. There are two common methods for deriving the area of a trapezium formula.
Method 1: Splitting into Two Triangles
Draw a diagonal line from one corner of the trapezium to the opposite corner. The diagonal splits the trapezium into two triangles.
- Triangle 1 has a base of length a and a height of h.
- Triangle 2 has a base of length b and a height of h.
The area of Triangle 1 = ½ × a × h
The area of Triangle 2 = ½ × b × h
Adding both triangles:
Total area = ½ × a × h + ½ × b × h
Factorising ½ and h:
Total area = ½ × h × (a + b)
This is exactly the area of the trapezium formula. The derivation confirms that the formula is not arbitrary; it comes directly from the triangle area formula that students already know.
Method 2: Using Two Congruent Trapeziums
Take the original trapezium and make an identical copy. Flip the copy upside down and attach it to the original along one of the non-parallel sides. The two trapeziums combine to form a parallelogram.
The base of the parallelogram is a + b (the sum of the two parallel sides of both trapeziums). The height of the parallelogram is h.
Area of parallelogram = (a + b) × h
Since the parallelogram is made of two identical trapeziums, the area of one trapezium is half of the parallelogram:
Area of trapezium = ½ × (a + b) × h
Both methods arrive at the same formula through different routes. Students who find visual reasoning easier tend to prefer Method 2.
Examples of Trapezium Area Questions
The following examples cover the range of question types students are most likely to encounter, from straightforward area calculations to reverse calculations in which a missing measurement must be found.
Common Mistakes to Avoid When Finding the Area of a Trapezium
A number of errors appear in how students approach trapezium questions. Being aware of these in advance reduces the chance of losing marks unnecessarily.
- Using the slanted side as the height: The height of a trapezium is always the perpendicular distance between the two parallel sides. It is not the length of either leg. If the diagram shows a slanted, non-parallel side with a labelled length, that measurement is the leg and must not be used as h in the formula.
- Forgetting the ½ in the formula: Students who have recently worked on parallelogram area questions sometimes drop the ½ when switching to trapezium questions. Writing out the full formula before substituting values is a simple habit that prevents this error.
- Adding the wrong pair of sides: The formula requires only the sum of the two parallel sides. If a question labels all four sides, students sometimes include a non-parallel side in the calculation. Always identify the parallel sides first by checking for the parallel line indicators (arrows) in the diagram before doing any arithmetic.
- Mismatched units: When measurements are given in different units within the same question, the area calculation will be incorrect unless all values are converted to the same unit first. A common PSLE version of this is giving one side in metres and another in centimetres within the same diagram.
- Incorrect square units in the answer: Area is always expressed in square units (cm², m²). In PSLE questions, the required unit is usually provided, and students must include it correctly in their final answer. Leaving out the unit or writing it incorrectly can result in a loss of marks.
Is the Area of a Trapezium an Important Concept for PSLE Students?
The trapezium area formula is a core part of the primary Mathematics syllabus and appears regularly across PSLE examination papers. It shows up not only in straightforward area questions but also in composite figure problems, where students must identify a trapezium within a more complex shape and calculate its area as part of a multi-step solution. Mastering this topic is not optional for students aiming for a strong result in Mathematics.
The trapezium also connects directly to other geometry concepts on the syllabus. Understanding how its area is derived reinforces students' grasp of the areas of triangles and parallelograms, as well as the concept of perpendicular height, which appears across multiple topics in both Primary 5 and Primary 6.
Practice Trapezium Questions with StudySmart
Knowing the formula is only the first step. Consistent, structured practice across different question types, including reverse calculations and composite figure problems, is what builds the accuracy and speed students need under exam conditions. StudySmart's PSLE learning platform is built to support that.
- 30,000+ Practice Questions Across All Topics: StudySmart gives students access to over 30,000 questions covering all 12 MOE syllabus topics, including geometry and area. Questions are available across difficulty levels, from foundational concept checks through to higher-order problem sums, ensuring students are always working at the right level of challenge.
- Instant AI Feedback After Every Question: Every answer is marked immediately by AI, with step-by-step explanations provided on the spot. Students understand exactly where they went wrong before moving on, rather than repeating the same error across multiple attempts.
- Adaptive Learning That Targets Weak Areas: StudySmart's adaptive technology identifies each student's specific gaps and recommends what to practise next. For geometry topics like the trapezium, this means students are progressively challenged with harder question types as their understanding improves, rather than revisiting questions they can already solve comfortably.
- Full MOE Syllabus Alignment: Every question on the platform is aligned to the current MOE Mathematics syllabus across Primary 1 to Primary 6, covering both Foundation and Standard levels. Students practise the right skills at the right stage of their learning journey.
Start Your Child's Maths Journey with StudySmart

Ready to take your child's Mathematics preparation to the next level with our online PSLE Maths practices? Our AI-powered learning platform offers thousands of questions across all topics, including geometry, fractions, and word problems, with instant step-by-step feedback.
Parents can also stay closely involved in their child’s preparation through the parent dashboard, which provides real-time visibility into topic mastery and question-level responses. This allows you to assign targeted practice where gaps appear, monitor progress, and celebrate achievements.
A personal mentor is also available to guide parents on how best to support their child between sessions, ensuring learning continues beyond the screen.
Begin with a 14-day free trial today and give your child the confidence to excel in PSLE Maths.